Smooth walls and ceilings will give your interior the neat look you’ve always wanted. It is also important when preparing walls for painting or other finishing work. To obtain a perfectly even surface, use plaster and then sand it down. If you don't know much about sanding down plaster and whether you need any special tools to do so, or you want to find out more about dust-free sanding, then we are here to help. Read on for some useful tips on how to clean and sand plaster.

Smooth walls and ceilings will give your interior the neat look you’ve always wanted. It is also important when preparing walls for painting or other finishing work. To obtain a perfectly even surface, use plaster and then sand it down. If you don’t know much about sanding down plaster and whether you need any special tools to do so, or you want to find out more about dust-free sanding, then we are here to help. Read on for some useful tips on how to clean and sand plaster.
Sanding plaster
Plaster is a very easy material for sanding. Another advantage is that it is not harmful to your health. These are among the reasons its use is widespread during renovation or finishing works, applied as a 2-mm layer between the cement and the paint. However, in order to obtain an ideal surface, i.e. smooth and even, you need to sand it down.
There are several ways to do this. First of all, you can choose between dry and wet sanding. In the first case, there is a further division into manual sanding, i.e. using sandpaper or abrasive mesh (a special plaster sanding block could also be a good solution) and machine sanding. For this purpose, special power tools – plaster sanders – are used for sanding down the plaster. Wet grinding, however, requires a little more skill and the use of special material.
All of these methods will be discussed in more detail later on in this guide, but before we get into the details, it is important to know that with sanding you should always start from the ceiling. To avoid scratches and surface irregularities, sand downwards and in the same direction. Plaster that is not sanded down properly will not fulfill its main purpose. It is important to remember this!

Sanding plaster with an orbital sander


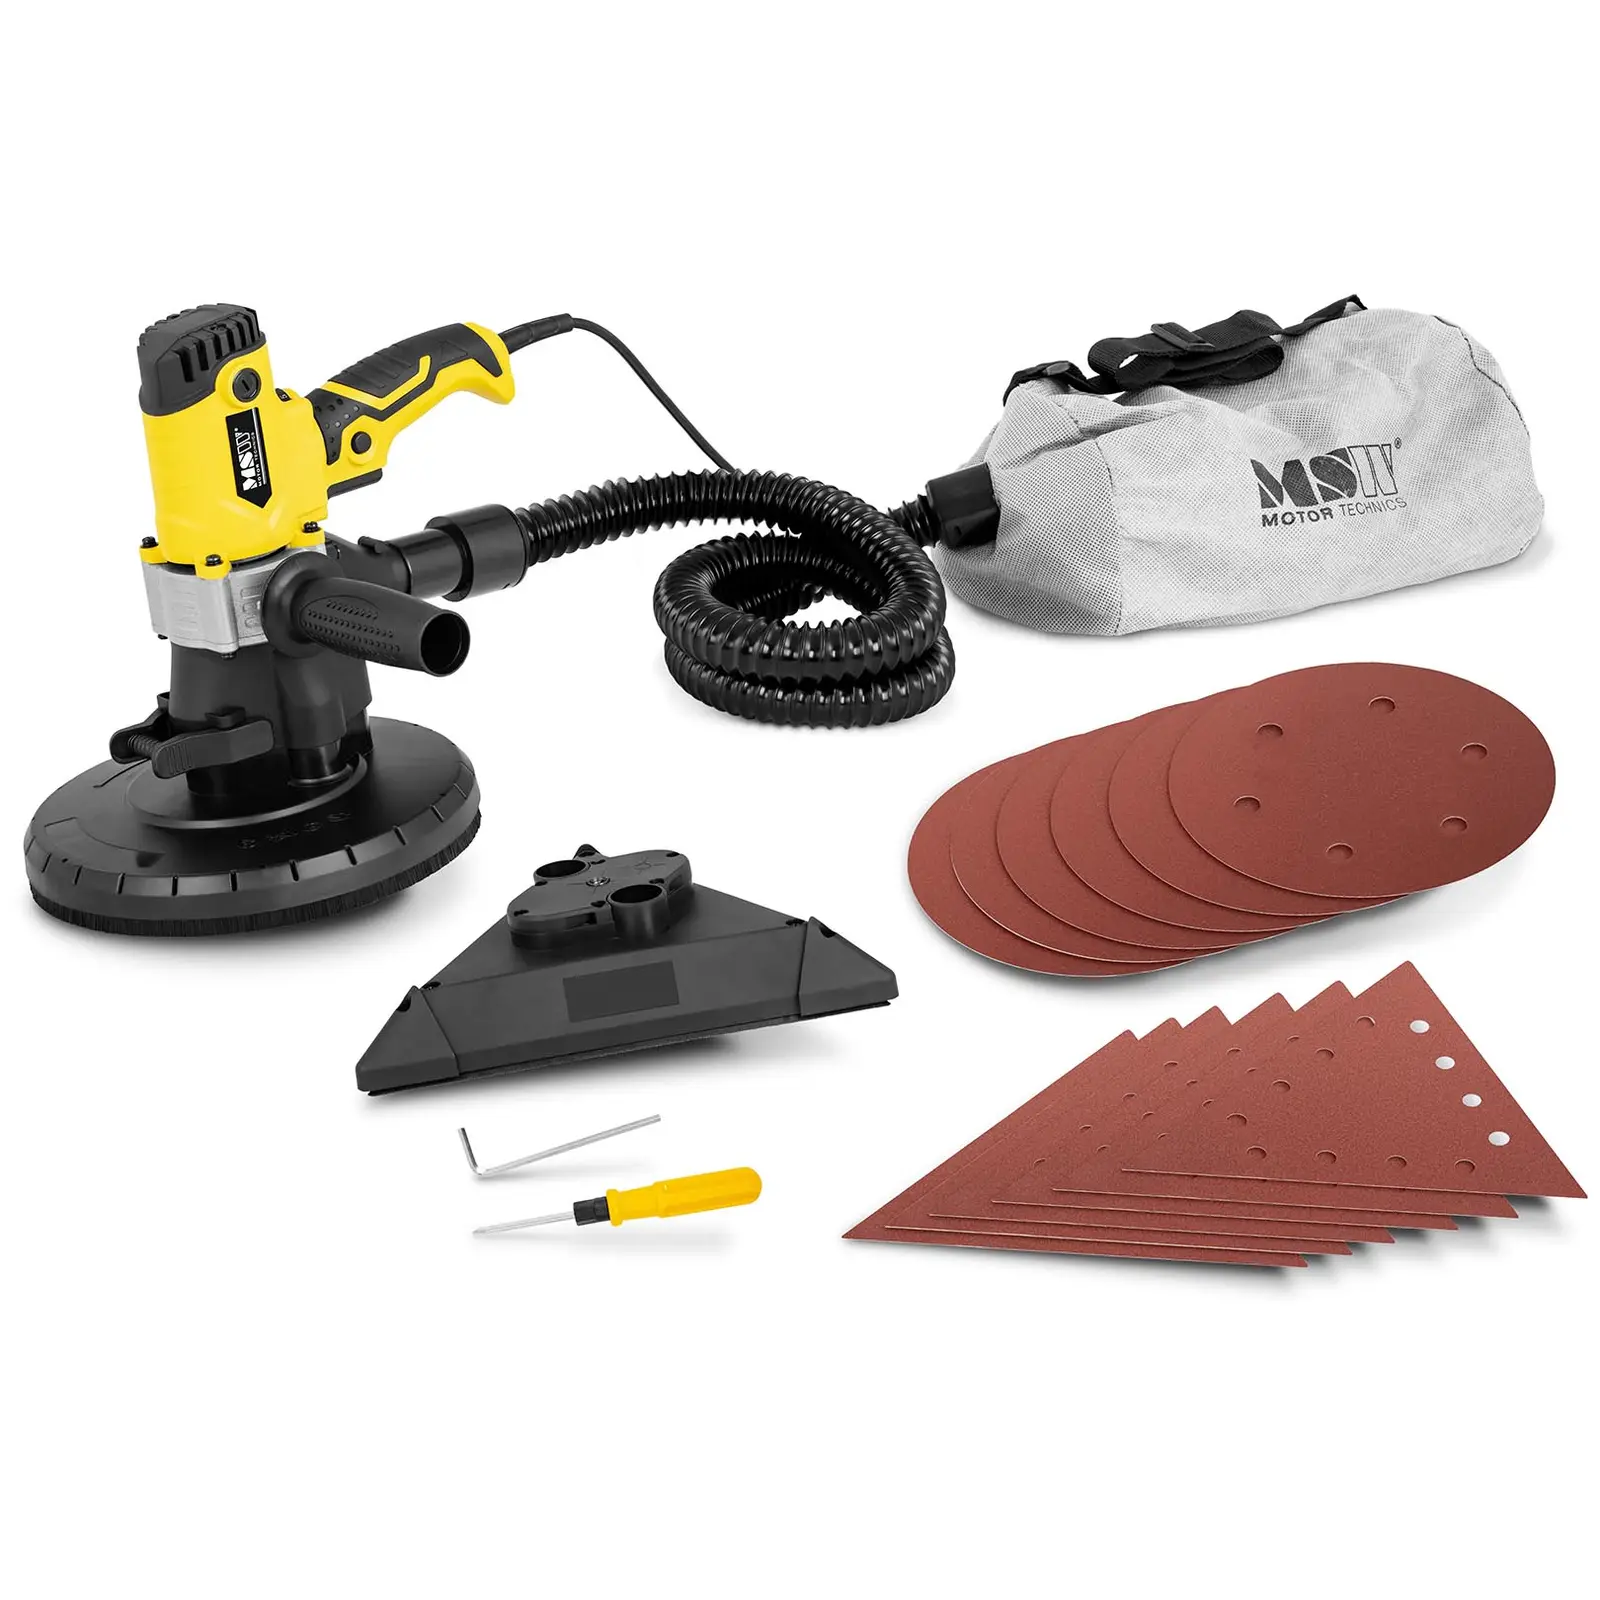
Although manual sanding works well on small surfaces and does not require the use of power tools, it is much more time-consuming than in the case of machine sanding. Also, machine sanding virtually eliminates the spreading of plaster dust particles around the room, which settle everywhere and take a very long time to get rid of, causing quite a nuisance.
Professional plaster sanders are equipped with an integrated dust extraction system, making life much easier. This allows, for example, to connect an industrial vacuum cleaner, which automatically sucks in the dust generated during sanding. Using an orbital sander in the case of large surfaces, e.g. when sanding walls, will also ensure high efficiency and work comfort, as well give you much better access to tight corners.
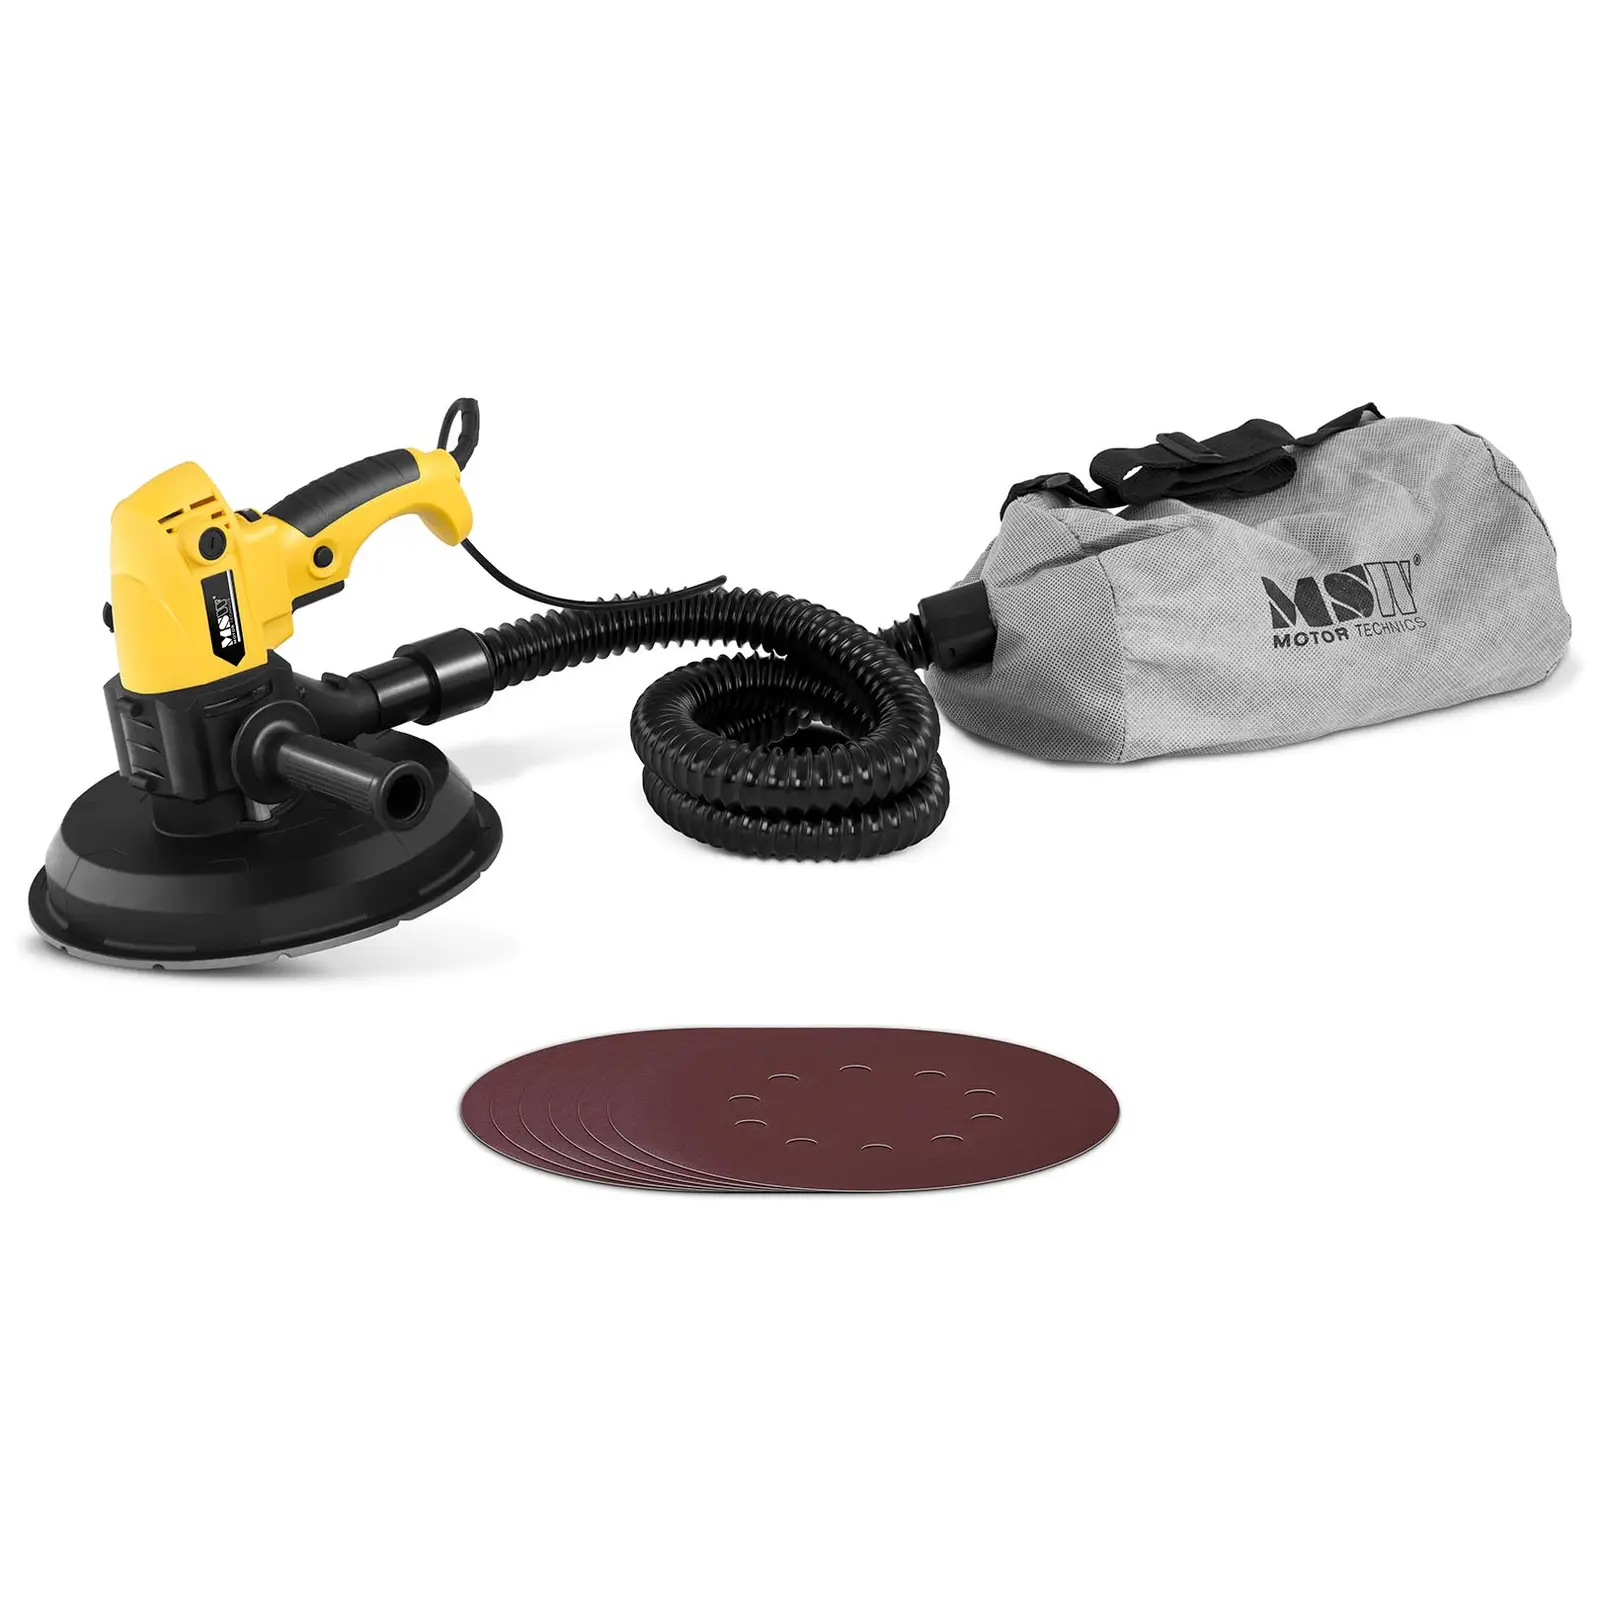
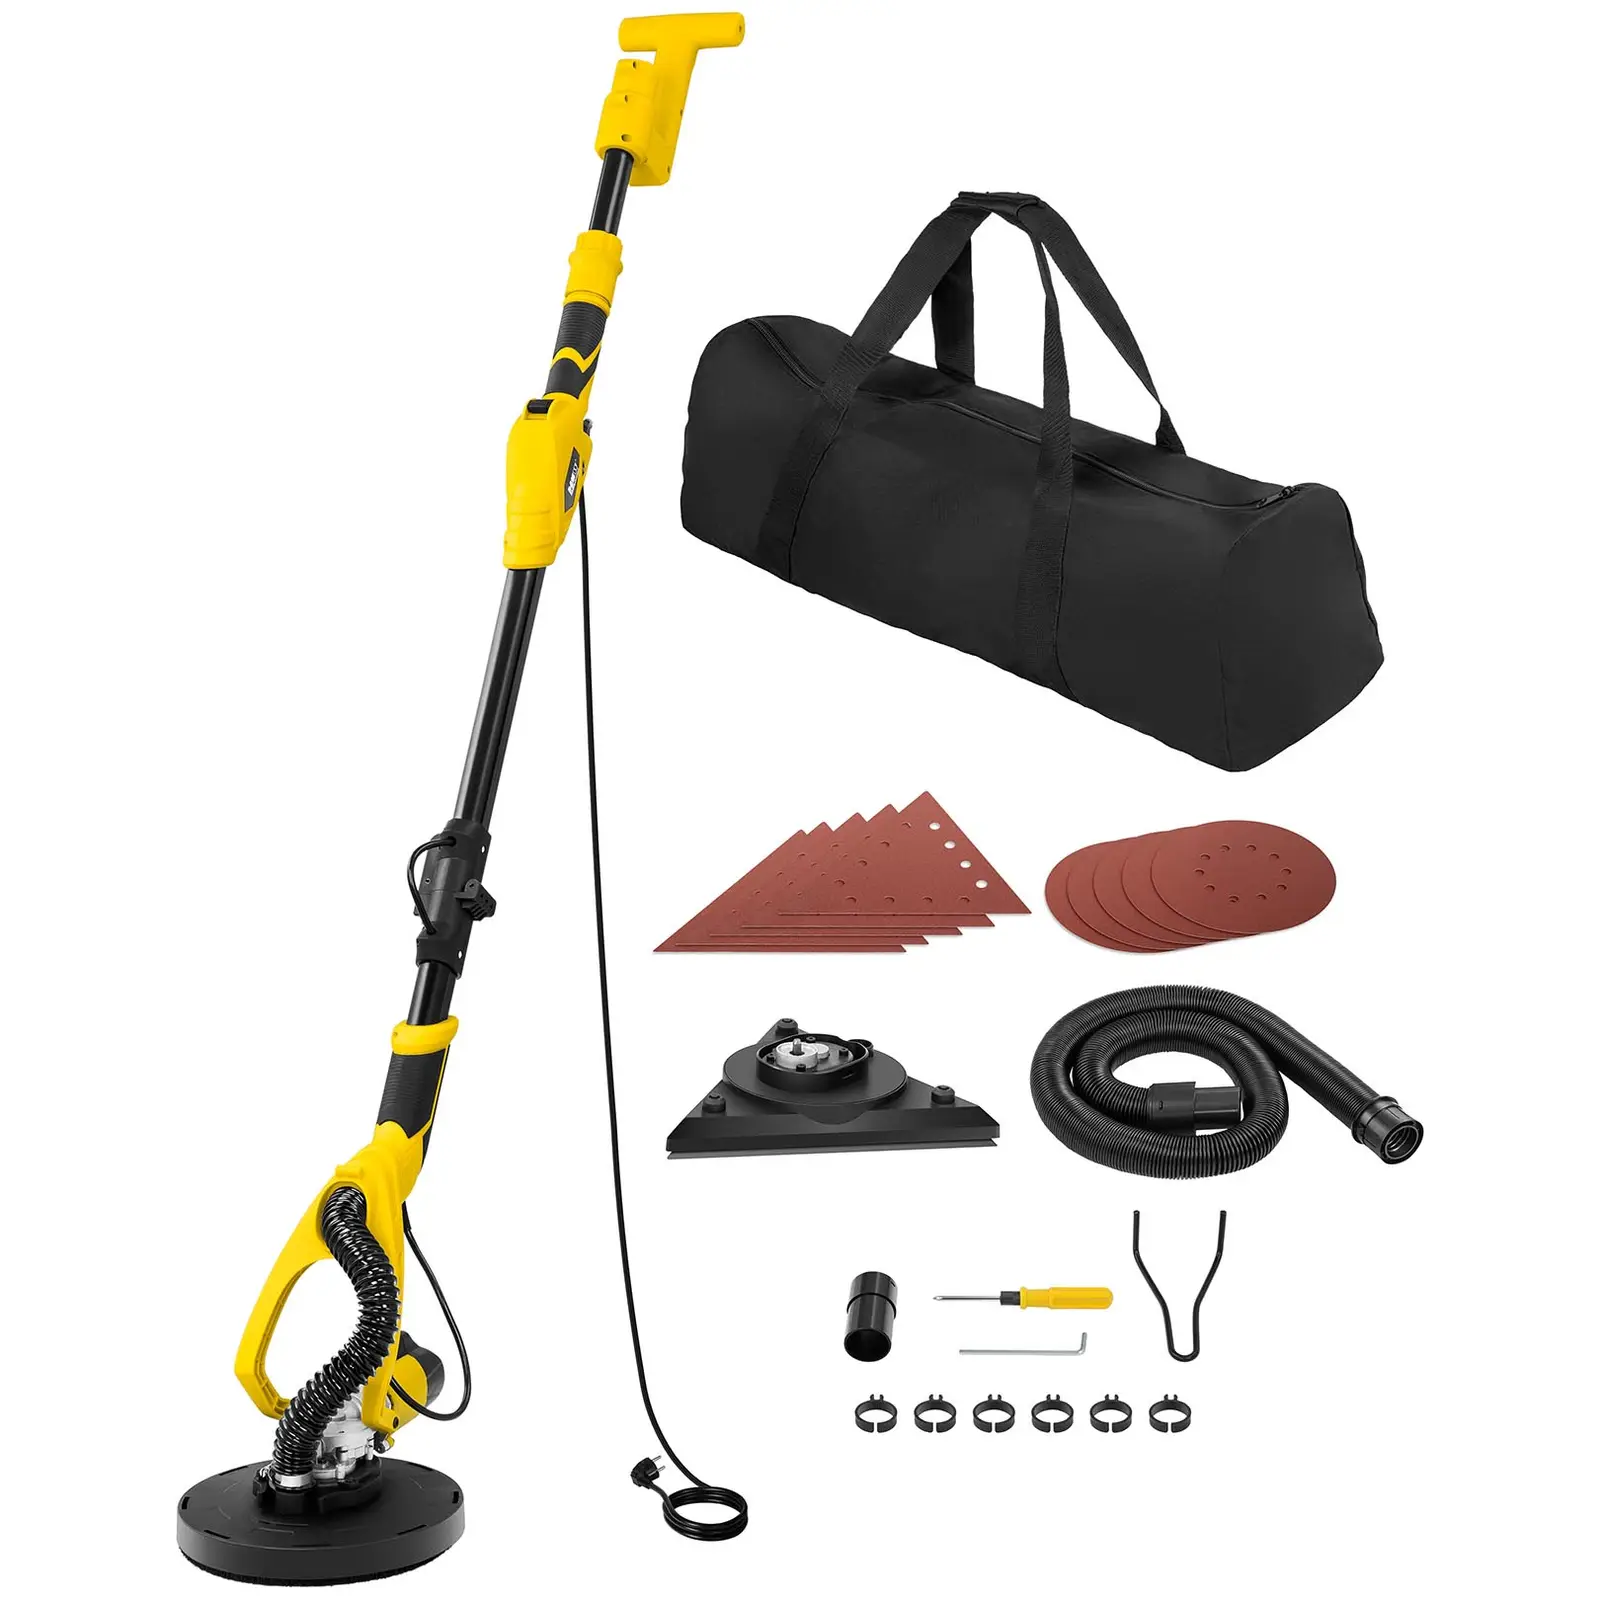
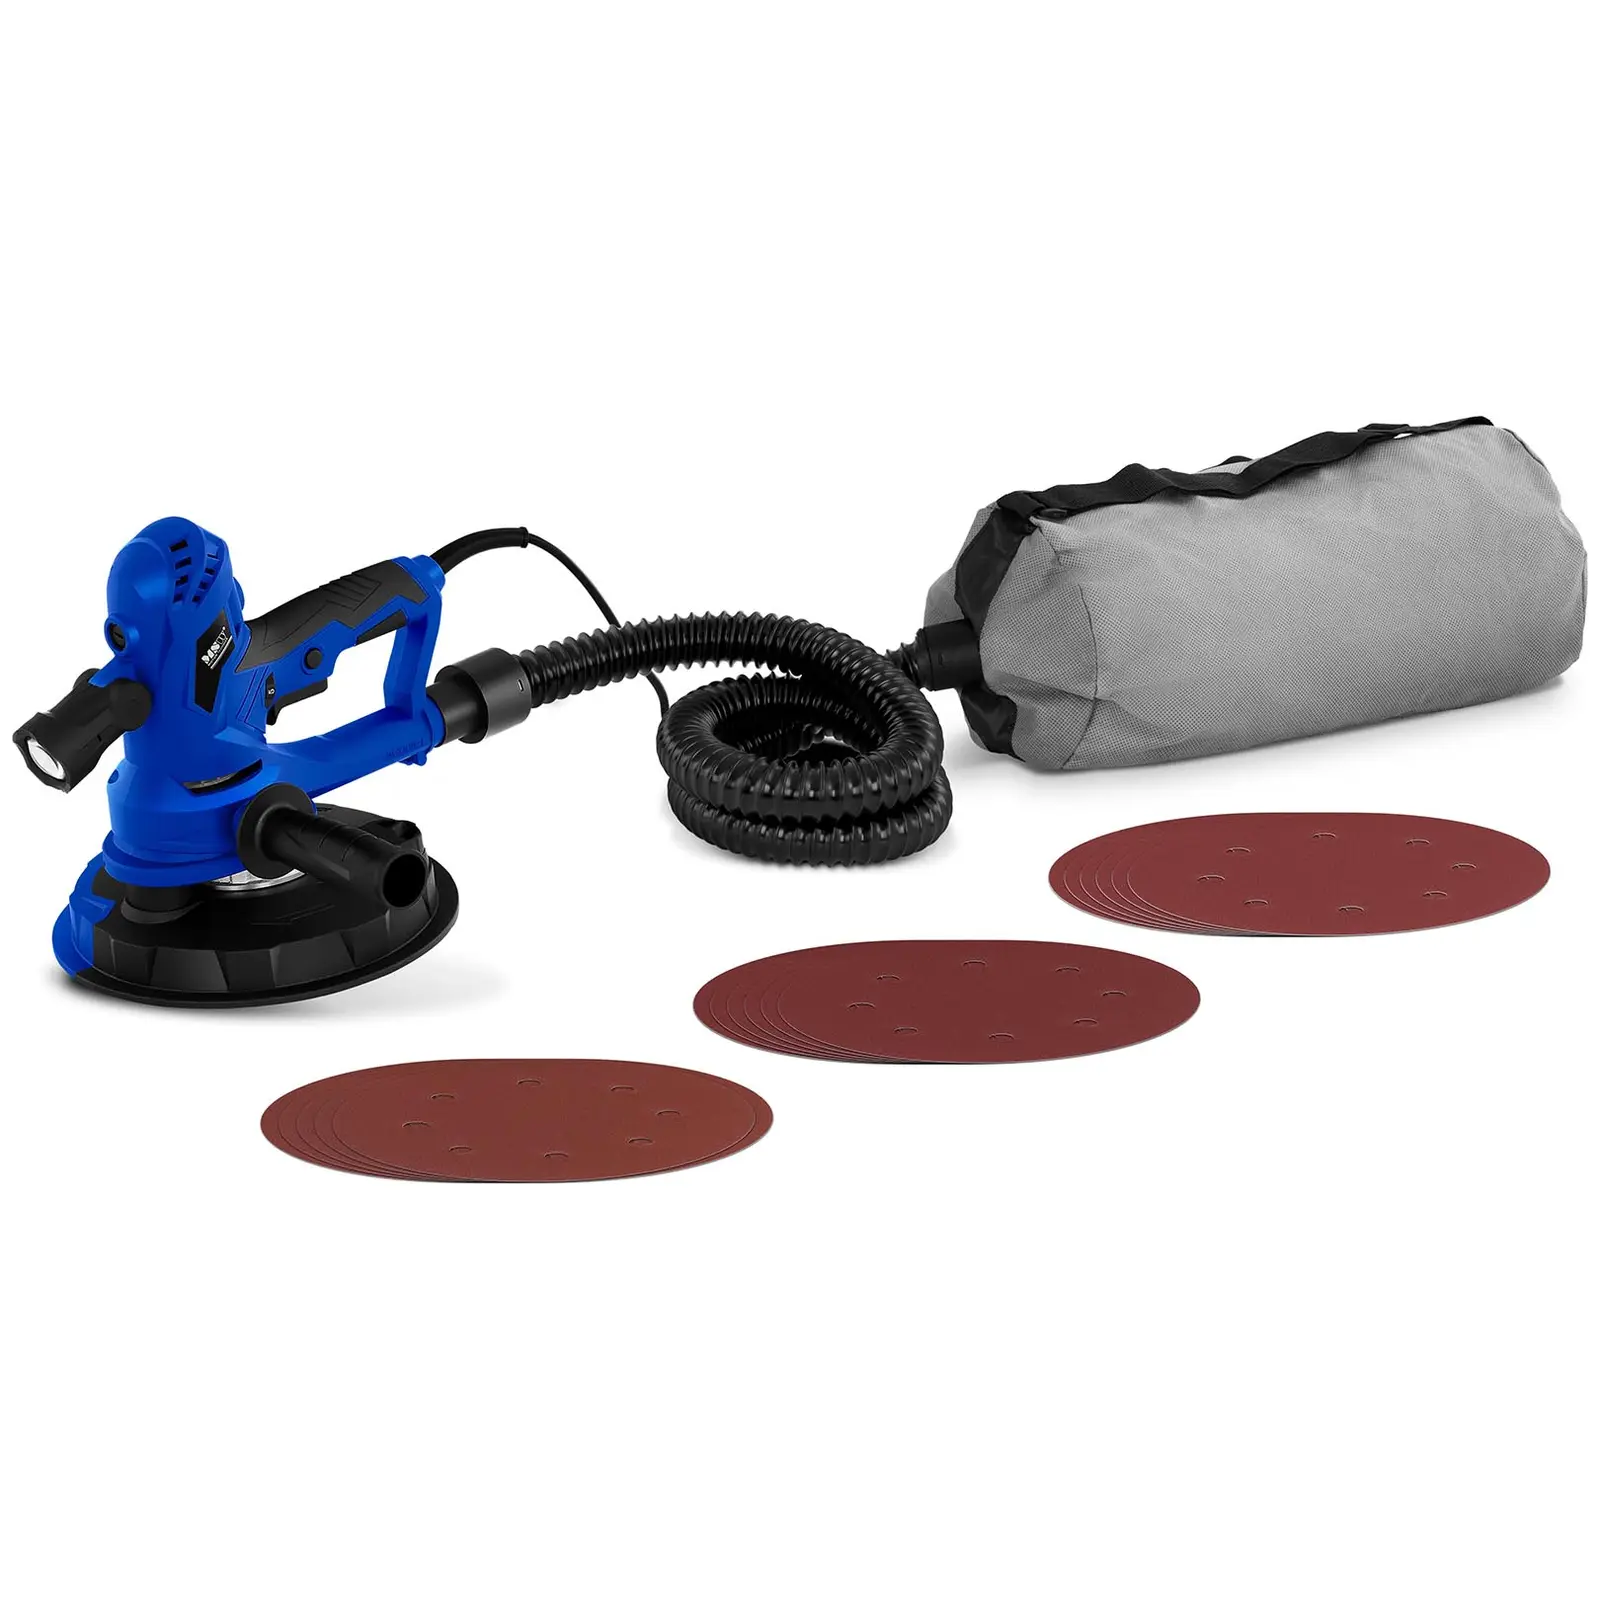
Using a pole sander
A pole sander will come in very useful during finishing works. It’s long handle allows you to easily reach the ceiling and high spaces. Power tools used for sanding, as mentioned earlier, are equipped with a dust extraction system, which lets you connect an industrial vacuum cleaner and not worry about keeping the room clean while sanding. Is pole sanding possible without a vacuum cleaner? Yes it is, because sanding sets very often include special dust bags connected to the outlet, which can be connected to a vacuum cleaner.
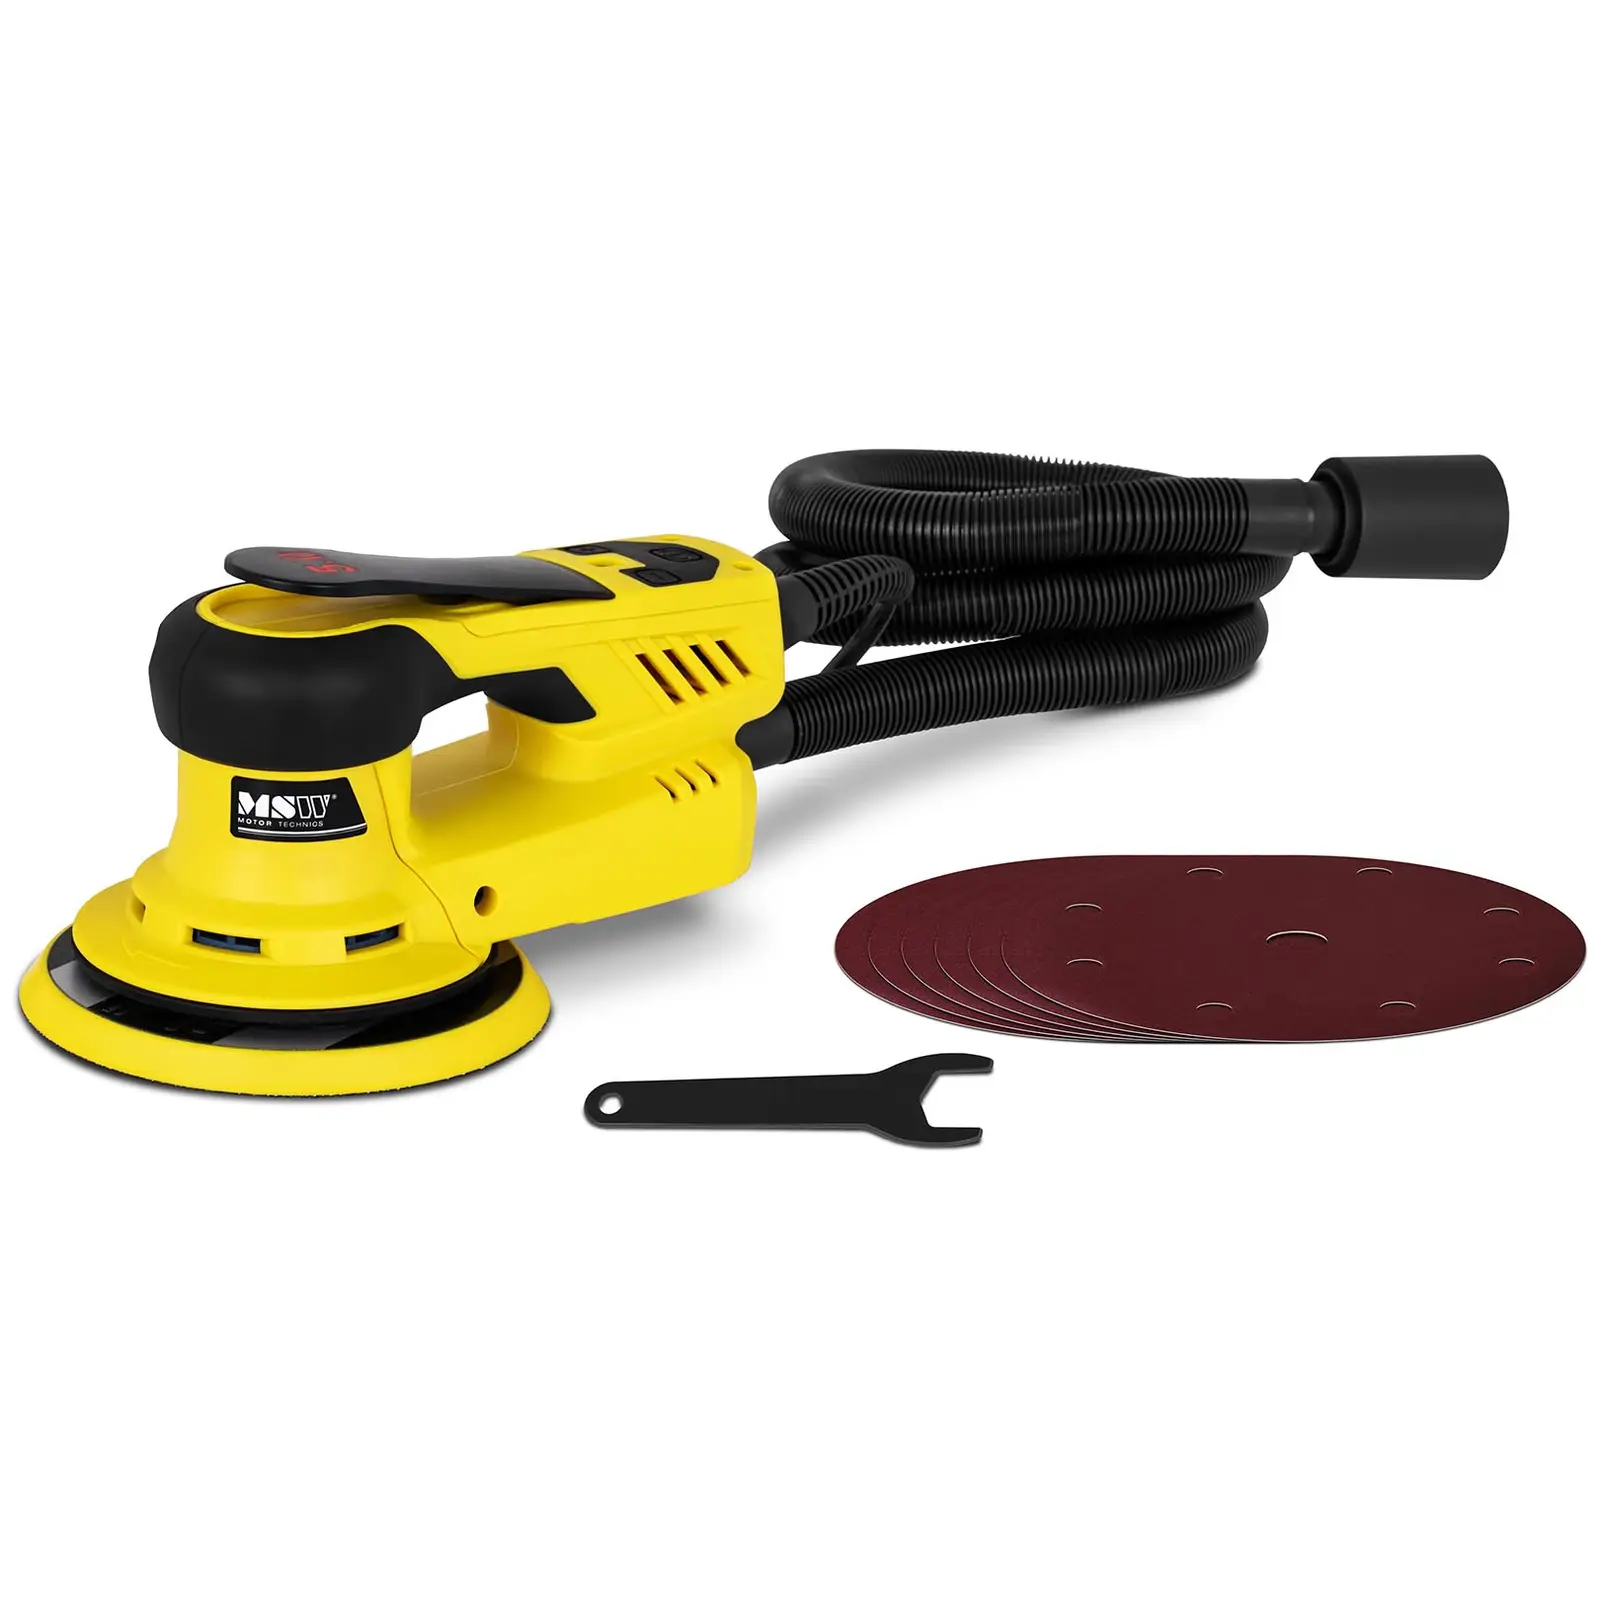
Plaster sanders usually use abrasive discs attached to the circular disc with Velcro. The standard diameter is 225mm. These discs are made of sandpaper or mesh, with special holes on the surface. Therefore, when choosing sandpaper discs, make sure that the number and arrangement of the holes both on the circular disc and on the abrasive disc are identical. This is important in order to suck up the dust.
Sandpaper
Regardless of whether you decide to sand the plaster manually or use a plaster sander, you will need to choose the right type of paper. Which type of paper is best? Read below to find out!
Let’s start with the fact that sandpaper can have different grades of granulation, or grit. Initial surface treatment should be done using P100 paper, which is the most delicate. Then, in order to effectively polish any remaining unevenness, and at the same time avoid making scratches that will ruin the final affect, you should gradually switch to a larger grit, e.g. P120 and P150. P180 paper should be used for final sanding.
An alternative to sandpaper is abrasive mesh. A mesh made of silicon carbide is often used for sanding plaster, as it is hard and extremely durable. This allows you to significantly shorten the sanding process compared to using sandpaper. In addition, the mesh can be turned over when it gets worn out, or blown clean when it get clogged with dust.
However, using mesh requires precision, otherwise it can cause visible scratches and unevenness on the surface. You should also remember to apply very well-mixed plaster in the case of any curves, as the small lumps that may appear are very difficult to get rid of with both sandpaper and sanding mesh. In some cases poorly mixed plaster is even impossible to properly sand. Remember that you can only start sanding once the plaster has completely dried off.
The material the sandpaper is made of is also important. The most common choice is aluminum oxide, although you can also find sandpaper made of precious aluminium oxide, which grains are more brittle and also sharper, helping achieve better results and reducing the risk of scratches. Sandpaper can also be coated with a special layer of zinc stearate, reducing the risk of clogging with dust and making it more durable.
Dust-free plaster sanding
Dust-free sanding, also called wet sanding, is very different. The process not only requires using special material, but is also more tricky than dry sanding. With wet sanding, after applying the plaster and leveling it out, you only have to wait for it to initially set. Then, using a felt trowel and after re-wetting the surface, you need to rub it down. The final smoothing is done using a metal trowel.
Dust-free sanding therefore doesn’t require the use of sandpaper, like with manual sanding, nor require using power tools such as plaster sanders. All you need is special dust-free plaster, as well as a fair bit of accuracy and precision, as you only use one layer. Dry-sanded surfaces, on the other hand, can be covered with several layers of plaster, letting you sand them several times.
Sanding plaster – summary
Once you’ve learnt the basics and have a general idea about sanding plaster, you can do home renovation or finishing works yourself. However, remember to choose the right material when deciding on one of the above-mentioned methods, and also make sure you have the right equipment with regards to both efficiency and comfort. Be thorough and follow the above tips, and you will certainly achieve the desired effect. Find out how to sand wood next!


Share